
Salads
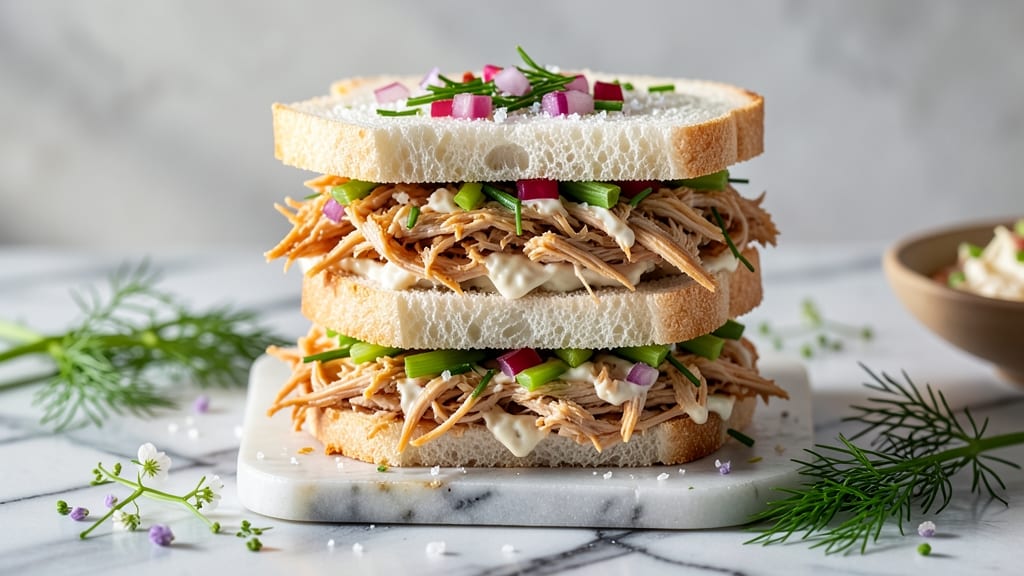
This chicken salad finger sandwich recipe brings back the charm of classic tea parties with crispy bread fringes that add just the right crunch. The secret lies in perfectly shredded chicken mixed with creamy mayo, fresh herbs, and a touch of lemon—simple ingredients that come together to create a filling so flavorful, every bite feels like a little celebration. I’ve been perfecting this recipe for years, and it’s become a staple at gatherings, always met with rave reviews.
What sets these finger sandwiches apart is the crispy bread fringe technique—lightly brushing the edges with egg wash before baking until golden. This adds texture and elevates the presentation, making them look as elegant as they taste.
The chicken salad itself is balanced with just the right amount of celery and herbs, ensuring it’s never dry or overwhelming. Whether you’re hosting a tea party or packing lunches, these sandwiches deliver a timeless appeal that’s hard to resist.
The result is a sandwich that’s classic in every sense—tender chicken, creamy dressing, and that satisfying crunch from the bread. The assembly is straightforward, and the portions are perfect for finger foods, making them ideal for parties, picnics, or even a sophisticated lunch.
Garnish with a sprinkle of paprika or fresh herbs for an extra touch of elegance, and you’ve got a dish that’s as beautiful as it is delicious.
For added versatility, you can swap the chicken for grilled vegetables or chickpeas for a vegetarian option, keeping the same crispy bread technique. The recipe scales easily, so you can make a batch ahead of time and enjoy the convenience of having a crowd-pleaser ready whenever you need it.
Let’s get started!
Ingredients for chicken salad finger sandwich
Simple ingredients that transform into elegant tea party bites with crispy bread edges.
| Ingredient | Amount | Notes |
|---|---|---|
| Cooked Chicken Breast 🍗 | 2 cups | Shredded or finely chopped |
| Mayonnaise 🥫 | ½ cup | Duck egg or regular mayo |
| Fresh Celery 🧅 | ½ cup | Finely diced, crisp |
| Red Onion 🧅 | ¼ cup | Finely chopped, mild |
| Fresh Dill 🌿 | ¼ cup | Chopped, stems removed |
| Fresh Chives 🌿 | 2 tbsp | Chopped, mild flavor |
| Lemon Juice 🍋 | 2 tbsp | Freshly squeezed |
| Salt 🧂 | ½ tsp | Diamond Crystal preferred |
| Black Pepper 🌶️ | ¼ tsp | Freshly ground |
| Unsalted Butter 🧈 | 2 tbsp | Softened for egg wash |
| Large Eggs 🥚 | 2 whole | Beaten for egg wash |
| White Bread Loaves 🍞 | 2 whole | Crusts removed, sliced |
| Paprika 🌶️ | 1 tsp | Smoked or sweet |
The chicken is the star here, so start with high-quality rotisserie chicken—it’s pre-cooked and saves time. If you’re using raw, boil it until tender and shred it while still warm. Trader Joe's has great rotisserie options, but any store-bought works. For the herbs, fresh is ideal—dill and chives add brightness, but dried will do in a pinch (use half the amount). The celery should be crisp, so avoid the wilted kind. If you’re feeling fancy, grab a bag of mixed salad greens for garnish later—it adds a pop of color.
No mayo? Greek yogurt mixed with a little olive oil works as a lighter alternative. Swap the dill for parsley if you prefer, but the chives are non-negotiable—they give that classic sandwich flavor. The egg wash is key for crispy edges, so don’t skip it. If you’re short on time, microwave the butter and eggs for 10 seconds to just melt it. For the bread, sourdough or brioche adds extra richness, but white bread is classic. And if you’re making these ahead, assemble the sandwiches first and wrap them tightly—they’ll stay fresh for 2 days in the fridge.
The bread edges crisp up best when baked at 375°F for 8-10 minutes, so keep an eye on them. Store leftovers in an airtight container with parchment between layers to keep them soft. These sandwiches reheat beautifully—30 seconds in the microwave with a damp paper towel revives the crisp. For parties, make the filling a day ahead and assemble the sandwiches just before serving. Trust me, the crispy edges are worth the extra step—it’s what makes these feel special.
Why You'll Love This Recipe
- Five-Ingredient Magic: I swear, this is the kind of recipe where you glance at your pantry and suddenly have lunch. Cooked chicken, mayo, celery, onion, dill—it’s like the kitchen version of a puzzle that fits together too perfectly. No fancy techniques, no last-minute grocery runs, just chop and mix.
- Crunchy-Creamy Bliss: That first bite? The celery’s sharp crunch cutting through the creamy mayo, the onion adding just enough bite, and the dill brightening it all up—it’s the kind of flavor combo that makes you pause mid-bite. Honestly, I’ve tried store-bought, but this tastes like actual lunch, not something from a jar.
- Lunchbox Legend: Between us, this is my go-to for school lunches, office picnics, or even a fancy charcuterie spread. Slap it on crusty bread for finger sandwiches, or let the kids assemble their own—my daughter insists it’s “the only salad she’ll eat.” (Yes, even on a Tuesday night.)
- Leftovers That Don’t Suck: Make a big batch on Sunday, and you’ve got snacks for the week. The flavor actually improves after a day in the fridge—more mellow, more balanced. And because it’s mayo-based, it holds up better than you’d think. Budget-friendly? Absolutely. Waste-free? Even better.
Step-by-step instructions for chicken salad finger sandwiches
Here's how to craft elegant finger sandwiches with perfectly crisp edges and creamy chicken filling.
Prepare the Chicken Salad Filling
In a large mixing bowl, combine the 2 cups of cooked chicken breast with the 0.5 cup mayonnaise. I like to use my hands for this part—it helps break up any large pieces while keeping the texture tender. Add the 0.5 cup finely diced celery, 0.25 cup chopped red onion, and 0.25 cup chopped fresh dill. These ingredients add freshness and crunch that balances the richness of the chicken.
Next, fold in the 2 tablespoons chopped fresh chives and 2 tablespoons lemon juice. The lemon brightens the flavors and prevents the salad from becoming too heavy. Sprinkle in the 0.5 teaspoon salt and 0.25 teaspoon black pepper, then gently mix everything together. You want the ingredients to be evenly distributed but still have some texture—don't overmix or the salad will turn mushy. Taste and adjust seasoning if needed, adding a pinch more salt or lemon juice as desired.
Make the Egg Wash and Prepare the Bread
In a shallow bowl, beat the 2 whole large eggs with a fork until fully combined. Add the 2 tablespoons softened unsalted butter and mix again until smooth. This egg wash will give your sandwiches that golden, crisp finish. In a separate small bowl, mix 1 teaspoon paprika with a tablespoon of water to create a paste—this will add color and subtle smokiness to the bread edges.
Remove the crusts from the 2 whole white bread loaves using a sharp serrated knife. Cut each loaf into 12 uniform slices—about 1-inch thick for classic finger sandwich proportions. You'll need 24 slices total (12 for top, 12 for bottom). Arrange the bread slices on a baking sheet in a single layer, leaving about ½ inch between each slice. This spacing prevents them from sticking together during baking.
Create and Assemble the Sandwiches
Using a round cutter or the rim of a glass, cut 12 circles from each bread slice—this gives you 24 circles total. Spread about 1 tablespoon of chicken salad onto the bottom half of each sandwich circle. Be generous but neat—you want enough filling to peek out slightly when closed. Place the top bread circle on each sandwich and gently press down to create neat, compact sandwiches.
Here's where the magic happens: arrange the assembled sandwiches on a parchment-lined baking sheet in a single layer. Brush the tops of the sandwiches with the egg wash, making sure to get into the edges. The egg wash is key for that perfect golden-brown finish. Sprinkle the paprika paste over the brushed tops, using about ¼ teaspoon per sandwich. This adds both visual appeal and a subtle smoky flavor that pairs beautifully with the chicken salad.
Bake for Crispy Edges
Preheat your oven to 375°F. Bake the sandwiches for 8-10 minutes until the edges are golden brown and crisp. Watch them closely toward the end—they should be just set but still soft in the center. The bread should hold its shape when lifted, with those beautiful crispy edges that make these perfect for tea parties.
Remove the sandwiches from the oven and let them cool on a wire rack for 5 minutes. This resting period helps them set properly. Serve immediately for the best texture—these sandwiches are best enjoyed fresh and crisp. For a classic presentation, arrange them on a tiered tray with toothpicks inserted diagonally through the center of each sandwich, ready for your guests to pick up and enjoy.
Pro Tips For Making Chicken Salad Finger Sandwich
- Shred, Don’t Chop: The chicken should be pulled into thin, even strands—not minced into tiny bits. Use two forks or your hands to separate the meat against the grain; it keeps the texture light and prevents a dense, mushy sandwich. I used to over-chop, and the salad turned out like a sad, heavy paste.
- Salt the Celery First: Toss the chopped celery in ½ teaspoon of salt and let it sit for 5 minutes before mixing with the chicken. This draws out excess moisture so your sandwiches don’t get soggy. I learned this the hard way after my first batch turned into a watery mess.
- Drain the Onion: After dicing the red onion, rinse it under cold water and pat it very dry with a paper towel. The residual acidity can make the mayo curdle, and damp onions ruin the crispness of the bread. Yes, it’s a pain, but trust me—it’s worth it.
- Mix Mayo Last: Add the mayonnaise right before assembling the sandwiches, not when you first combine everything. The celery and onion release water over time, and if you mix the mayo in too early, it’ll turn greasy and separate. Stir just enough to coat, then taste and adjust—this keeps the texture perfect.
Regional styles of this chicken salad finger sandwich
British Tea Party
In the UK, finger sandwiches are a cornerstone of afternoon tea, often served with clotted cream and strawberry jam on the side. The classic cucumber and cream cheese combo is popular, but chicken salad remains a timeless favorite.
I love adding a touch of Dijon mustard to the mayo for extra depth—just ½ teaspoon blends seamlessly. Serve with Earl Grey tea for the ultimate British experience. 🍵
Southern U.S. Picnic
Down South, these sandwiches get a smoky BBQ twist. Swap the paprika for ½ teaspoon smoked paprika and add 1 tablespoon BBQ sauce to the chicken salad.
Use sourdough bread for extra heartiness, and serve with sweet tea and pickles on the side. The Southern touch makes them perfect for summer picnics or tailgates.
French-Inspired Croque
For a French-inspired version, replace mayo with a mix of ¼ cup crème fraîche and ¼ cup Dijon mustard. Add 2 tablespoons chopped shallots and 1 tablespoon chopped tarragon to the filling.
Use baguette slices instead of circles, and top with Gruyère cheese before baking. Serve with a chilled Sancerre for an elegant brunch. 🥖
Italian Antipasto
In Italy, finger sandwiches often appear as antipasti at gatherings. Mix the chicken salad with ¼ cup chopped sun-dried tomatoes and 2 tablespoons chopped basil. Use ciabatta bread for a rustic touch, and garnish with balsamic glaze after baking. Pair with Prosecco and olive tapenade for an Italian-inspired spread.
Modern Twist: Veggie Wrap
For a contemporary take, skip the bread entirely and use large tortilla wraps. Spread the chicken salad on the wrap, add spinach and avocado, then roll tightly.
Slice into pinwheels and bake at 375°F for 6-8 minutes until golden. This version is perfect for lunchboxes or veggie-forward gatherings. 🌱
Nutrition facts
Frequently asked questions
Can I make these sandwiches ahead of time?
Assemble the sandwiches without baking and store them in an airtight container with parchment paper between layers. They'll stay fresh for up to 2 days in the fridge. When ready to serve, bake them fresh for 8-10 minutes at 375°F to restore that perfect crispy edge. The filling can even be made 1 day ahead—just keep it covered in the fridge.
What's the best bread for crispy edges?
White sandwich bread works perfectly for classic finger sandwiches, but sourdough or brioche adds extra richness. The key is removing crusts and using a round cutter for even circles. For maximum crispiness, brush the edges with egg wash before baking—this creates that golden, crunchy finish everyone loves.
How do I fix soggy sandwiches?
Soggy sandwiches happen when moisture from the filling seeps into the bread. To prevent this, pat the bread dry before assembling and use just enough filling (1 tablespoon per sandwich). If they get soggy after baking, pop them in a 350°F oven for 2-3 minutes to crisp up again. For extra insurance, bake them for just 7 minutes instead of 10.
Can I make this vegetarian?
Yes! Swap the chicken for grilled eggplant or zucchini (thinly sliced and baked until tender), or use chickpeas for a protein-packed option. Keep the same egg wash and baking method—it'll still give you those beautiful crispy edges. Add sun-dried tomatoes or avocado for extra flavor.
Why is my egg wash not crisping the edges?
The egg wash needs to be applied generously and the oven temperature must be accurate. Make sure your oven is fully preheated to 375°F and the bread edges are well-coated. If they're still soft, try baking for 1-2 extra minutes or increase the heat to 390°F for the final minute. Also, make sure your bread slices are 1-inch thick for even crisping.